Campaigns send a designed email to a selected audience. Creating a campaign saves its setup; the message is not sent until you activate it.
Open Kelune CRM → Campaigns, then select Create Campaign.
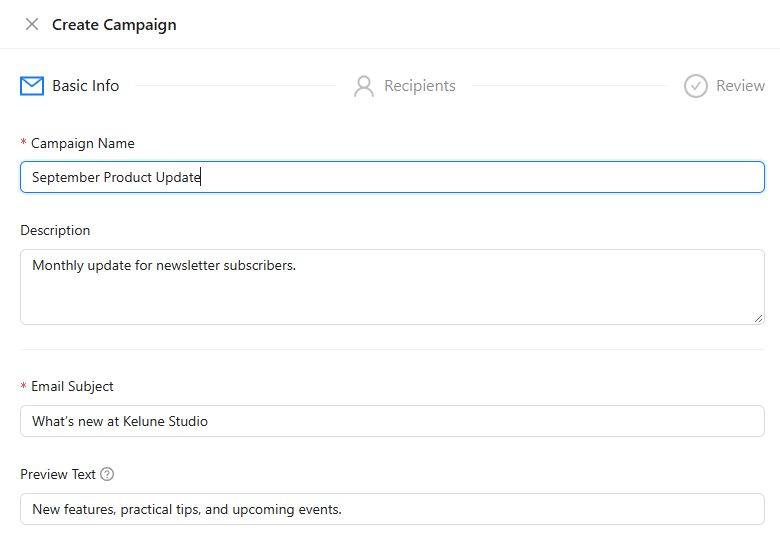
1. Add the basic information
Enter an internal campaign name and optional description, then add the recipient-facing Email Subject and Preview Text.
Choose how the message will be sent:
- Global Email uses the WordPress email configuration from Settings → Global Email.
- Email Provider uses an active SMTP, Amazon SES, Mailgun, or SendGrid connection.
- Custom lets you enter the From name, From email, and Reply-To address for delivery through WordPress.
When using Email Provider, select the connection and a sender identity accepted by that provider.
2. Choose the recipients
Build the audience by selecting one or more target lists or tags. Kelune CRM Pro can also target dynamic segments.
Use the exclusion controls to remove matching lists, tags, or—when Pro is active—segments from the final audience. Exclusions are useful for suppression groups, existing customers, or contacts who should not receive this particular message.
3. Review the campaign setup
The review step summarizes the campaign name, sender, subject, preview text, recipient count, and delivery timing. Correct any unexpected sender or audience information before creating the campaign.
Choose one delivery option:
- Send immediately when activated starts delivery after you activate the campaign.
- Send at a scheduled time after activation waits until the date and time you specify.
Create the campaign to save it and open its email builder.
4. Design and test the email
Build the message with content blocks or start from a saved template. Add the email copy, images, buttons, links, and footer information.
Before sending:
- Preview the email.
- Send a test to yourself or another reviewer.
- Check the subject, preview text, sender, personalization, images, and every link.
- Save the latest version.
5. Activate the campaign
Return to the campaign controls and activate it only after the audience, content, and timing are final. An immediate campaign begins sending when activated; a scheduled campaign becomes ready and waits for its scheduled time.
After sending begins, use the campaign report and email logs to monitor delivery, engagement, bounces, and failures. See How to View Email Logs and Campaign Reports.