Use the contact importer to move an existing audience into Kelune CRM from a .csv, .xlsx, or .xls file.
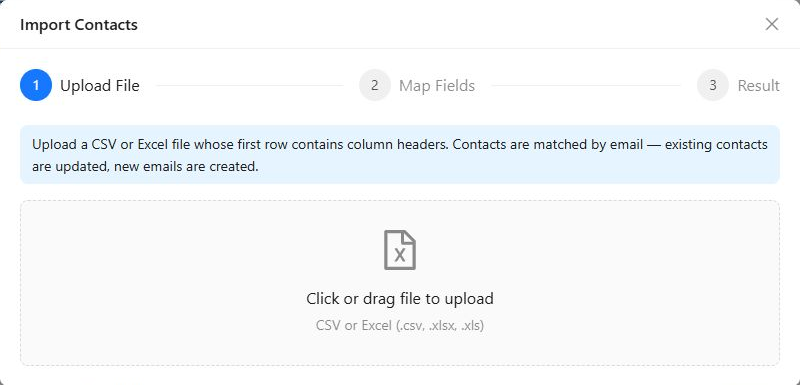
The import has three stages: Upload File, Map Fields, and Result.
Prepare the file
Put column headings in the first row and one contact in each remaining row. Include an Email column because Kelune CRM uses the email address to match records.
Your file can include standard contact fields, custom fields, and comma-separated list or tag names.
| Example heading | Example value |
|---|---|
Email |
[email protected] |
First Name |
Ava |
Company |
Kelune Studio |
Lists |
Newsletter Subscribers, Customers |
Tags |
Newsletter, Customer |
Upload the file
- Open Kelune CRM → Contacts.
- Open the More menu and select Import.
- Select or drop your CSV or Excel file into the upload area.
- Continue to Map Fields.
Map the columns
Each spreadsheet column appears beside a sample value and a Maps To selector. Review every suggested mapping and choose the Kelune CRM field that should receive the data.
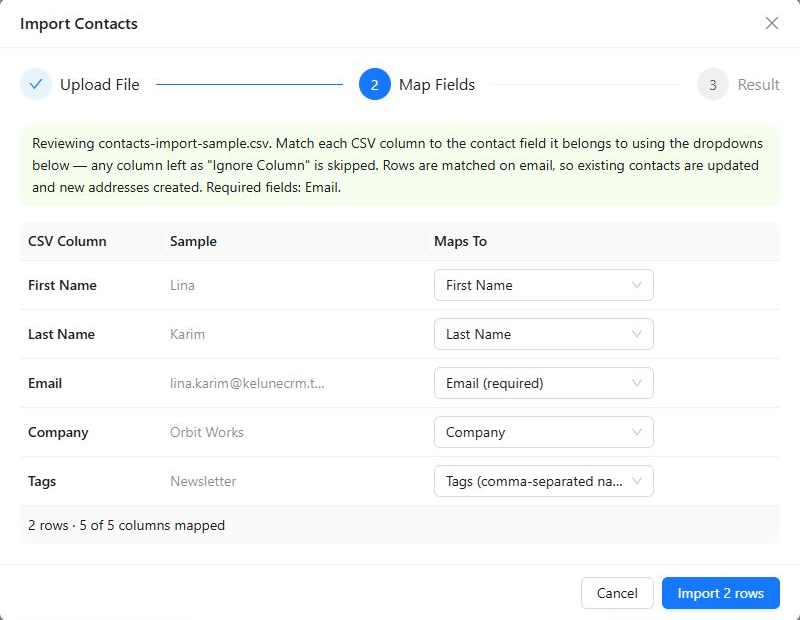
Available destinations include:
- Email, name, company, and phone fields.
- Address, country, status, source, and lead score.
- Lists and tags using comma-separated names.
- Any custom fields already created in Kelune CRM.
Choose Ignore Column for data that should not be imported. The mapping screen shows the number of rows detected and how many columns are mapped.
Run and review the import
Start the import after confirming the mappings. The Result step reports how many contacts were:
- Created because no matching email existed.
- Updated because the email matched an existing contact.
- Skipped because the row could not be imported.
When rows are skipped, review the row number, email address, and reported issue. Correct those rows in the source file, then import the corrected data again.
Lists and tags in the file are attached to the matching contacts. Names that do not yet exist can be created during the import.